How to Back Up an iPhone to a Computer (Windows Guide)



An iPhone backup on your own computer beats any cloud plan in two ways. It’s free at any size, and it sits on hardware you control. Setting it up takes ten minutes on Windows, and one checkbox in the process decides whether your passwords and Health data survive. Here’s the full walkthrough, traps included.
Summary
To backup an iPhone to a computer, connect it by cable and use iTunes on Windows 10 or the free Apple Devices app on Windows 11, then click Back Up Now. Tick Encrypt local backup so Health data and saved passwords are included, and write the encryption password somewhere safe.
| Your Windows Version | The App to Use | Where the Backup Lands |
|---|---|---|
| Windows 10 | iTunes (apple.com or Microsoft Store) | A hidden MobileSync folder, path depends on the iTunes version |
| Windows 11 | Apple Devices app (Microsoft Store, free) | C:\Users\[username]\Apple\MobileSync\Backup |
Table of Contents
Which App Backs Up an iPhone on Windows?
Windows 10 uses iTunes, either the apple.com download or the Microsoft Store version. Windows 11 has a cleaner option, the free Apple Devices app from the Microsoft Store, which handles backups, restores and updates without the rest of iTunes.
Both write the backup into a hidden folder on C:. Which folder depends on which app made it, and our guide on where iPhone backups are stored on Windows shows both paths with a five second shortcut to each.
How Do You Back Up an iPhone to a Computer?
The process is identical in spirit across both apps. Cable in, trust, back up.
- Connect the iPhone to the PC with a cable, plugged straight into the machine rather than a hub.
- Unlock the phone and tap Trust when the prompt appears, then enter your passcode.
- Open iTunes and click the small device icon, or open the Apple Devices app and select your iPhone.
- Under Backups, choose This Computer, and tick Encrypt local backup. The next section explains why that box matters.
- Click Back Up Now and leave the phone connected until the progress bar completes.
First backups run longest because everything travels across. Later backups move only what changed, so the ten minute setup pays off from the second run onward.
Should You Encrypt the Backup?
Yes, and here’s the part most guides skip. An unencrypted backup deliberately leaves out your Health data, Activity history and saved passwords. Apple lists these exclusions in its official backup methods guide. Tick Encrypt local backup and all of it comes along, protected by a password you choose once.
Write the encryption password down today
An encrypted backup opens only with its password, forever. Apple can’t reset it for an existing backup and neither can any tool. Store it in a password manager or on paper in a safe place the moment you set it.
“The single checkbox people skip is Encrypt local backup, and it decides whether your saved passwords and Health data survive. Tick it, pick a password you’ll still remember in five years and write it somewhere safe. An encrypted backup without its password is a locked safe with no key.”
Viralkumar Patel in | iData Backup Viewer Team, CYBERSICS SOLUTIONS
How Do You Check the Backup Actually Worked?
A progress bar reaching the end proves the process ran, not that your data is readable. Check twice.
First, the timestamp. iTunes and the Apple Devices app show Latest Backup with a date and time under the Backups section. Confirm it matches the run you just made.
Second, look inside. iData Backup Viewer opens the backup on Windows 10 and 11 and previews the actual contents free, so you see your messages, photos and contacts sitting readable in the backup rather than trusting a timestamp. It’s the difference between believing a backup exists and knowing what it holds.
- Install iData Backup Viewer and launch it. It detects backups in both Windows locations on its own.
- Select the fresh backup, entering your encryption password if asked.
- Browse the categories and spot check the data that matters most to you.
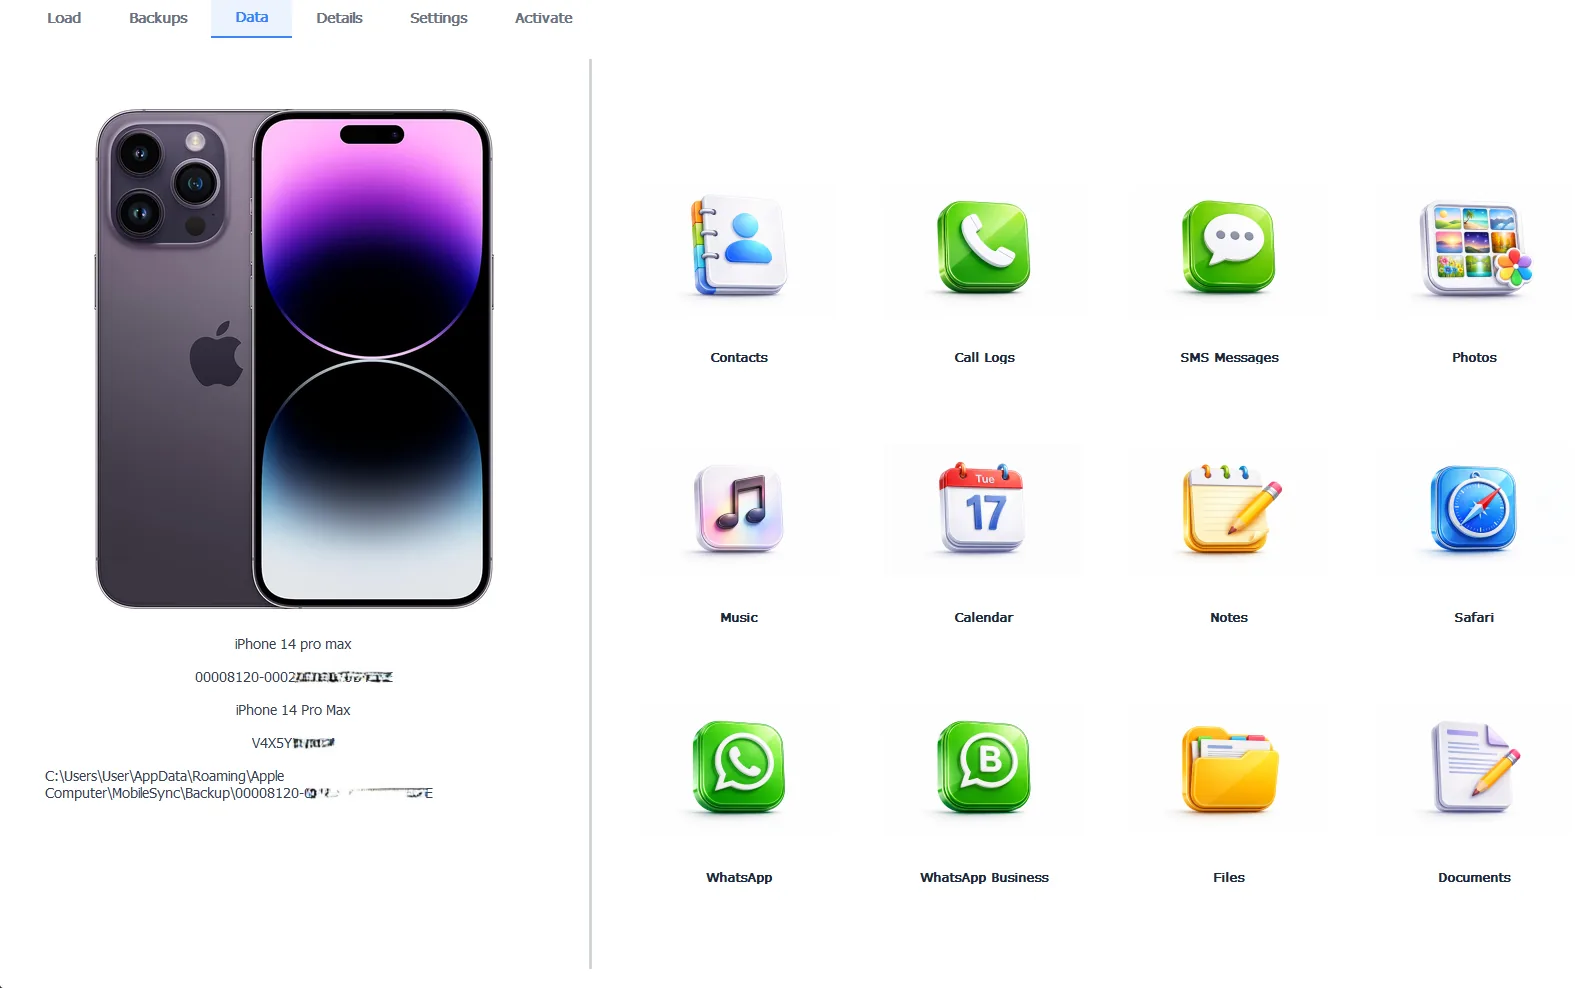
Step 3: iData Backup Viewer previewing the contents of a fresh iPhone backup
The preview stays free forever. The Pro edition at $49 per year adds exports for the day you need data out, and everything runs 100% locally on your PC.
Free version previews your backup contents. Works on Windows 10 and 11.
What Doesn’t Go Into a Computer Backup?
Apple’s rule from the same guide above. Content that already syncs to iCloud stays out of the backup, because Apple sees no point storing it twice. iCloud Photos is the big one, and it catches people constantly, as we covered in our guide on extracting photos from an iPhone backup. Messages in iCloud follows the same logic.
Media synced from a computer, App Store apps and store purchases also stay out, since they re-download from their sources. The backup carries your data and settings, not the software.
How Do You Stop Backups from Overwriting Each Other?
iTunes and the Apple Devices app keep one backup per device and refresh it on the next run. Yesterday’s snapshot doesn’t stack next to today’s. It gets replaced.
For moments that matter, archive manually. Copy the whole device folder from the backup location to another spot before the next sync, and that snapshot becomes permanent. Do it before erasing a phone, before selling one and before major iOS updates. If the day comes when you need that archive back on a phone, our guide on restoring an iPhone from a backup covers every route.
So the checklist is short. Right app for your Windows version, encryption on with the password written down, a spot check inside the fresh backup and an archived copy whenever a snapshot is worth keeping. Ten minutes of setup buys you a way back from every lost, broken or erased iPhone in your future.
When did your iPhone last get backed up to something you control?
Frequently Asked Questions
Can I back up an iPhone to a computer without iTunes?
On Windows 11, yes. The free Apple Devices app from the Microsoft Store creates and restores backups without iTunes. On Windows 10, iTunes remains the tool for the job.
How much space does a backup need?
Plan for tens of gigabytes. A full modern iPhone commonly needs 20GB or more, minus whatever already syncs to iCloud. Keep comfortable free space on C: before starting, since a backup that runs out of room fails partway.
Does the backup include my photos?
Only when iCloud Photos is turned off. With it on, Apple syncs your photos to iCloud and leaves them out of the computer backup by design, so check that setting before relying on the backup for your library.
Where does the backup get saved?
In one of two hidden folders depending on which app made it. Desktop iTunes writes under AppData while the Store version and the Apple Devices app write under your user profile. Both paths take five seconds to open with the right shortcut.
Can I back up straight to an external drive?
Not through any Apple setting. iTunes and the Apple Devices app always write to the default folder on C:. The working method is a folder junction that redirects Windows to the other drive, set up once in Command Prompt.
How much and how frequently should I back up?
Back up before every iOS update, before repairs and before travel, then keep a regular habit between those. Remember each new backup replaces the last one, so copy the backup folder aside when a snapshot matters, like before erasing a phone.
Written by Viralkumar Patel in
Viralkumar works on iData Backup Viewer at CYBERSICS SOLUTIONS, where he helps Windows users read, recover and export data from iPhone backups.